
This Easy Scones Recipe will ensure your afternoon tea or cream tea is just like being at a tea house in England. These light and fluffy scones are irresistibly good.
» You might also like this Classic Crepe Recipe or this Bagel & Lox Sharing Board.
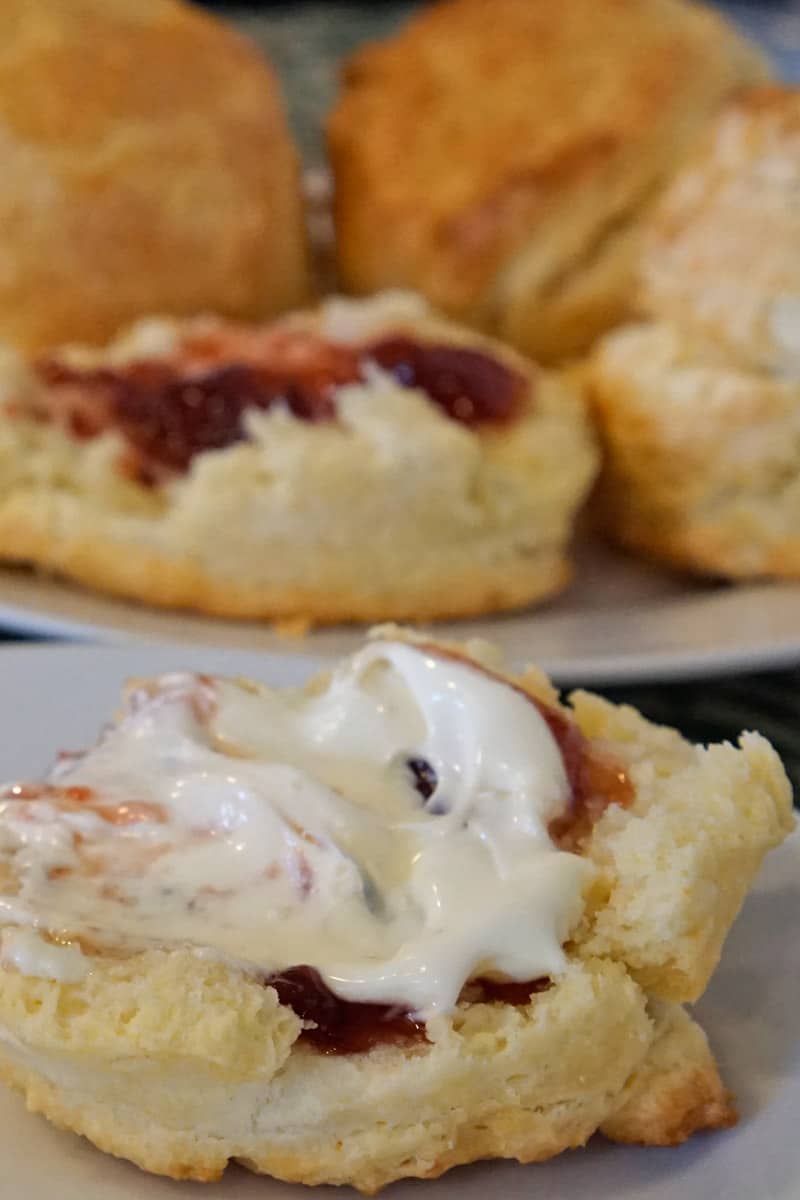
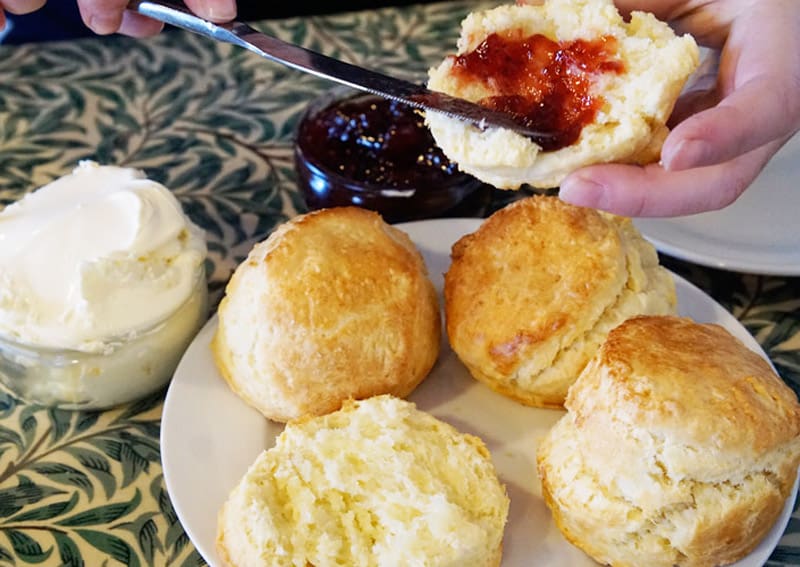
This simple English scone recipe will hit the spot if you’re craving some tender scones with clotted cream and jam! English scones are such a delight. Warm and soft inside, it makes just the right base for almost any topping or add-in.
My family generally makes these fluffy scones with cranberries, raisins, or chocolate chips. Some of our other favorite flavors are cranberry orange, lemon, and these apple scones with maple cinnamon glaze.
But to be honest, nothing beats just plain English scones with jam and clotted cream. This recipe for big fluffy scones will not disappoint.
Serve them for afternoon tea with these perfect cucumber sandwiches.
Ingredients For Scones
Here are the scones ingredients. These measurements are given only in weight because it’s very important to use the exact amount of the ingredient that’s called for. Using cups is a sure way to make bad scones.
- 250 grams plain flour – I use all-purpose flour in the U.S., and plain flour in the UK.
- 20 grams baking powder – make sure it’s very fresh as stale baking powder won’t work well
- 6 grams salt
- 50 grams butter – I use unsalted, very cold butter. You can put it in the freezer for a few minutes to firm it up and make sure it’s very cold before starting. As the cold butter melts in the oven, it creates steam pockets that help the scones rise and creates a lighter texture.
- 25 grams sugar – Granulated white sugar.
- 125 milliliters milk – Also use very cold milk. Start by adding it slowly as the amount needed can vary and you won’t want to put too much.
- 1 large egg – Chill the egg before using.
How to Make Classic English Scones
The ingredients are given in grams for this recipe because the measurements need to be precise. It’s always best to weigh the ingredients with a food scale rather than using cups.
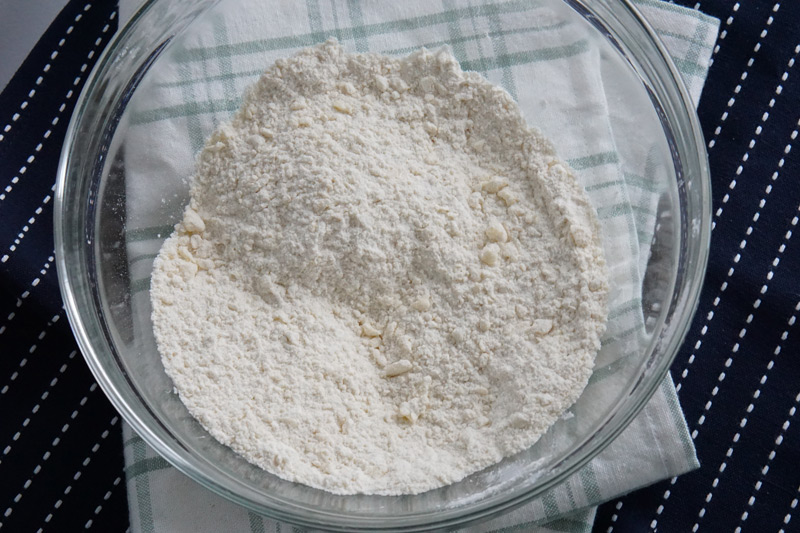
So here’s how to make scones. Start by combining the flour, baking powder and salt together in a mixing bowl. Add the butter in chunks and cut the butter into the flour mixture with a pastry cutter, or rub it in with your hands, until the mixture resembles course sand.
You can also combine these ingredients in a food processor, if you’d rather not mess with the pastry cutter. It will save some time. If you do the mixing in the food processor, take the mixture out at this point and add it to a mixing bowl for the rest of the mixing. Using a machine to combine the rest of the ingredients will surely overmix it and result in dense scones.
Next, whisk the sugar, milk and egg together in a separate bowl until combined. Add it to the rest of the ingredients, stirring until just combined. Do not over stir. The mixture should be a wet dough now. It should be quite sticky, but not tacky. This is important because too little or too much liquid will affect the rising.
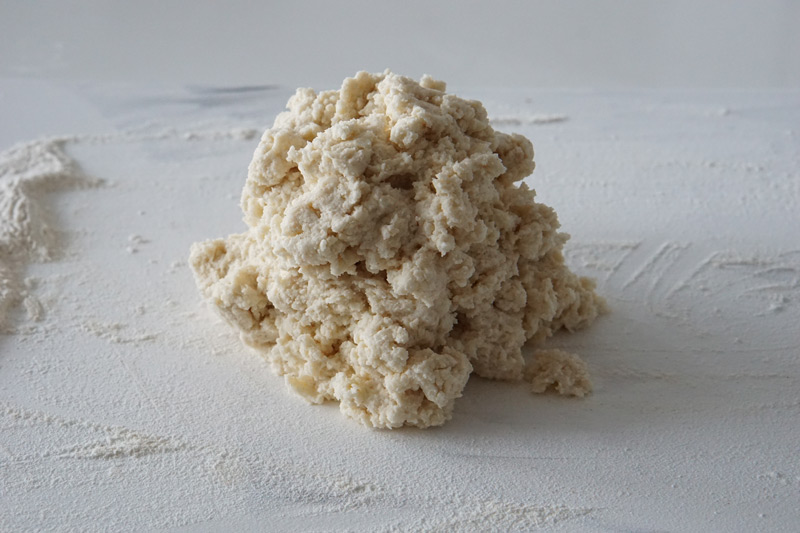
Transfer to a lightly floured countertop and pat it until the dough comes together. Don’t knead the dough, just pat it together.
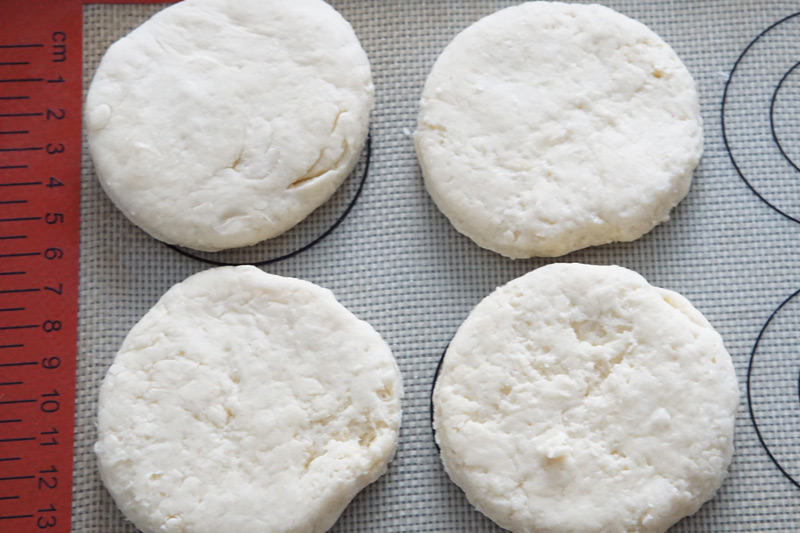
Press or roll the dough to about 3 cm thick and use a floured cutter to cut circles. Be sure not to twist the cutter. Press down firmly in one push.
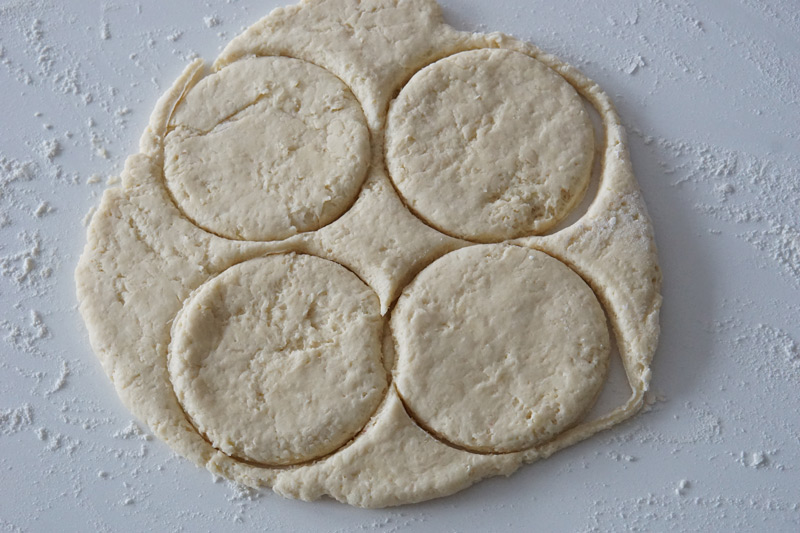
Twisting will hamper the rise. Re-roll the scraps if necessary to cut out 8 scones.
Place the scones onto a baking sheet lined with parchment or silicone mat. At this point, it’s a good idea to place the scones on the tray into the freezer for about 30 minutes. Chilling the scones relaxes the gluten in the flour, which makes the scones more tender and allows them to rise higher. It also chills the fat, which will make the scones a bit flakier.
Just don’t leave them in the freezer for too long, or they will take longer to bake. You don’t need to thaw the scones before baking.
How to Bake Scones
There’s no need to wait for the scones to rise. You should put the scones into the oven right away. Make sure the oven is properly and fully preheated before putting them in. It’s also a good idea to make sure your oven is actually at the temperature it says it is with an external thermometer. The wrong temperature can ruin the scones.
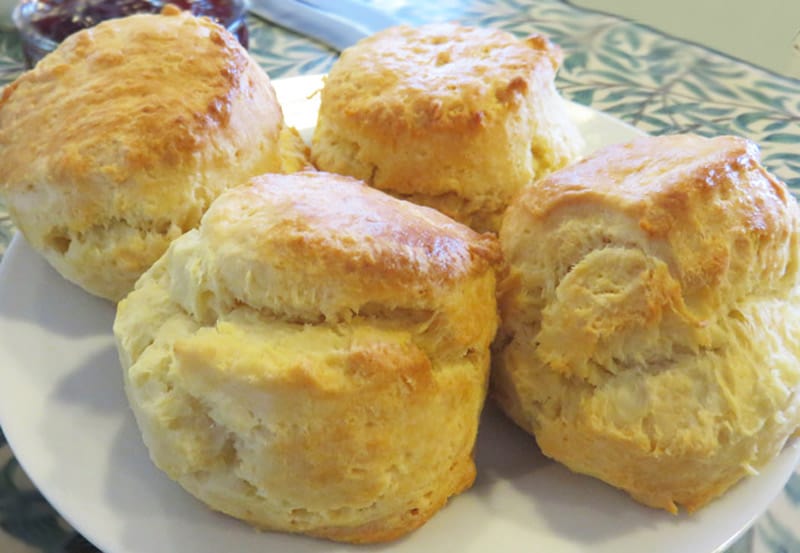
Bake the scones for 10-12 minutes, until about tripled in height, and golden brown on the tops and bottoms. If yours don’t look quite done yet, give them another few minutes. Every oven varies. While this is a very easy scone recipe, a properly calibrated oven is essential to success.
What Makes Scones Soft & Fluffy?
To make flaky, fluffy scones, you need to start with cold butter. Just take it out of the fridge right before you make this best scone recipe.
Cold butter allows you to keep little globs of butter within the flour when you mix it. When the dough is baking the butter will melt inside the scone and leave a perfect buttery and flaky scone. If you don’t have a pastry cutter or food processor try using a cheese grater to grate the cold butter.
Three other things contribute to high-rising homemade scones. One is the baking powder you use. It needs to be fresh. If it’s more than 6 months old, it may not work well. You can add an extra tsp to the mixture, if it’s a bit older, to ensure the scones will rise.
Tips for Making Light & Fluffy Scones
- It is important to work with very cold ingredients. Very cold butter, milk, and eggs.
- For the best texture and rise, place the pan of scones in the freezer for 30 minutes, uncovered. Chilling the scones relaxes the gluten in the flour, which makes the scones more tender and allows them to rise higher. It also chills the fat, which will make the scones a bit flakier.
- The amount of mixing you do can greatly affect the scones. Once the liquid is added to the dough, you need to do the least amount of mixing possible. The dough will be crumbly and somewhat chunky. It should not be smooth and elastic, like pizza dough.
- When you turn it out on the countertop, don’t add extra flour to it, unless it’s actually too wet. It will be sticky. That’s how it’s supposed to be. If you add more flour to take away the tackiness of the dough, it will affect the final product.

- When you’re cutting the scones out with the cutter, be careful not to twist the cutter. This has a big affect on the rising ability, because it sort of seals the sides together, so it doesn’t rise as much.
- Bake the scones in the upper part of your oven.
Reasons Your Scones Don’t Rise
As stated above, there are a number of reasons scones don’t rise. Unfortunately, some batches just don’t rise like they should, even if you seemingly did everything right.
Some things that can affect the rise of your scones are:
- Altitude and humidity – higher altitude helps with rise
- Letting the dough sit out too long before baking
- Using warm or melted butter
- Too wet or too dry dough
- Not mixing in the butter with the flour properly before adding the milk
- Using old baking powder or flour
- Overkneading the dough
- Twisting the cookie cutter when cutting out the circles
- Putting them into the oven before the precise temperature has been reached
You can see that making scones is rife with problems. If you’re counting on a super fluffy and well-risen scone, you may not get that on your first try (or every time you make these).
The good news is that even when the scones don’t rise, they are still really tasty and are usually still fluffy inside. While I have times when the scones don’t rise, they are always still fluffy and light. The only time they won’t be is if you overmix them.
Adding Fruit to Scones
There are many different ways you can change up these scones, if you want. Some of our favorite additions are:
- Raisins
- Dried cranberries
- Blueberries
- Lemon zest
- Chocolate chips
If you decide to add fruit to this recipe, it’s best to use dehydrated fruit, like raisins or dried cranberries. Fresh fruit, with the exception of berries, usually contains too much water, which will change the consistency of the scones.
Mixing in chocolate chunks also adds a sweet twist to this classic. Just make sure to take into account the sugar content of the chocolate and add less sugar if you don’t want a super sweet scone.
Can I Freeze These Scones?
The dough of this recipe freezes well. Once all ingredients are combined and you’ve cut out your scones, you can freeze them in a sealed plastic bag.
We recommend placing the unbaked scones in the freezer on a plate or tray for 30 minutes anyways, so once they are frozen solid, place them in a zip-top plastic bag. Return them to the freezer, and store for up to a month. Bake as directed (without thawing), adding a couple of extra minutes in the oven if needed.
Make sure that when bringing the dough back up to temperature that you do not use a microwave as this will compromise the texture of the dough.
It’s also possible to freeze the already baked scones. Make sure they’ve cooled completely before sealing them into a freezer bag with all the air squeezed out. They’ll keep for up to a month.
How to Store Scones
Store scones in an airtight container at room temperature or in the refrigerator for 3-4 days. They can be reheated for a few seconds in the microwave or toasted on the stovetop to heat them up and make them fluffy again.
What Our Readers Are Saying
You don’t have to just take my word for it. Hundreds of readers have tried this recipe and loved it. See below some of the reviews we’ve received from visitors on Pinterest.

What Are Scones?
If you’ve made it this far into the post and still aren’t quite sure what a scone is, let’s clear that up right now. The word “scone” can mean slightly different things depending on where you are. American scones are typically sweet, dense, and dry. They are shaped as triangles and often include things like dried fruit and zest.
English scones, which are the scones you will be making in this recipe, are different. They are round and super fluffy and light. They’re more like an American biscuit, but they are slightly sweeter than a typically savory biscuit.
Variations of Scones
As you might expect, English scones do not typically include other ingredients and add ins like American scones do. We have a simple recipe for Orange Cranberry scones here. You can use that scones recipe as a base to make other types and variations. Some of our favorites are listed below:
Other Scones Recipes to Try
YOU MIGHT ALSO LIKE


Like it, Love it, Want Some More of It? Subscribe to our YouTube channel to watch us cook and follow us on Pinterest, Instagram and Facebook. We really love it when you save our recipes to Pinterest 😊

Classic Scones
Ingredients
- 250 grams (2 cups) plain flour
- 20 grams (1 1/4 tablespoons) baking powder
- 6 grams (1 teaspoon) salt
- 50 grams (3 1/2 tablespoons) butter very cold
- 25 grams (2 tablespoons) sugar
- 125 milliliters (1/2 cup) milk very cold
- 1 large (1 large) egg
Instructions
- Preheat oven to 425°F (220°C). Line a large baking sheet with parchment paper or a silicone baking mat and set aside.
- Sift the flour, baking powder and salt through a sieve into a large mixing bowl.
- Add the cold cubed butter to the mixing bowl. Using a pastry cutter, incorporate the butter into the flour until it is in small crumbs.
- Whisk the sugar, milk, and egg in a separate bowl. Pour into the dry ingredients and mix gently, just until a soft dough forms. Do not over mix.
- Press or roll out the dough into a circle on a lightly floured cutting board. The dough should be about 2 cm thick.
- Using a round cookie cutter, cut out 8 scones, being careful not to twist the cutter. Place the scones on the baking sheet.
- You can now opt to place the scones in the freezer for 20-30 minutes to make them extra cold. This will help with the rising. Just don't leave them longer than 30 minutes.
- Brush the tops of the scones with milk.
- Bake for 12-15 mins until golden brown.
Notes
- This recipe is written in the metric system because this is how we were taught in England to make the scones. Using weight measurements is the best way to ensure you get the exact amount of the ingredient you need for perfect scones.
- If your scones don’t rise properly, there are a number of reasons this may have occurred. Read the tips in the post for full instructions.
Nutrition
Other Posts You Might Like:
- Homemade Ice Cream Recipes for the Ice Cream Maker
- Instant Pot vs Pressure Cooker: Which is Better?
- BBQ Pork Belly Slices Recipe
Pin it for later


Jillian Morris is the resident baker for A Food Lover’s Kitchen. She started baking when she was very little and found she had a great passion for it. She is a high-schooler in a small town in Oregon, where she enjoys music, writing, and baking in her spare time.
I just want to have another cup of Tea just now. This is making me hungry for sure. Yum.
Li ho fatti…..ma l’impasto è venuto molto molle…..infatti son venuti un po’ bassi , ma cotti e morbidi. Buonissimi ma avrei voluto un impasto più compatto.
Hi Patty. It’s possible that you didn’t have enough flour in dough. Different types of flour can lead to different weights. If you make them again, increase the flour slightly.
Grazie
These look perfect!! So tall and fluffy, I love scones so much and I need to try your recipe for them as they look fantastic!
Homemade scones are the best! These look perfect. 🙂
One of the easiest ways to make scones that I’ve seen, that’s for sure. Love how delicious they came out in the end – just what I would prefer in the morning! 🙂
This quickly became my new favorite scone recipe! So easy to make!
Really quick and easy and so light.
So glad you liked them. Perfect for a cream tea!
did not turn out like pic… followed recipe perfectly and did not overwork the dough. DISAPPOINTING!!
In what way did they not turn out? Perhaps I could help you figure out what went wrong.
I some what agree you had to have a lot more flour then 250 grams,
But when I put more it came together, I baked it and I have to admit it was really delicious
I think the ratio of baking powder to flour is wrong. They turned out very nice and fluffy, but with a slight ‘fishy’ aftertaste. Normal ratio is 1 tsp to 120 grams of flour.
It is a bit more baking powder, which helps them rise better, but I’ve made this many times and never had a fishy taste. Is it possible that your baking powder was stale?
Deeeeel icious scones ,so light and fluffy …. I don’t think they will last very long ….
Happy to hear that!
The best scone recipe I’ve tried. It is officially my go to!
So happy to hear that Mary! Enjoy.
Excellent recipe! Thank you for baking the scones in a hot oven! A hot oven also helps the scones to rise. Also, when adding the cold cubed butter, you can use a grater to grate the cold butter into the flour mixture. This method of adding the butter will need to be worked into the flour with your fingers as well, but not as much work as cubed butter. Another tip for beautifully browned tops is to use a whole egg and 1tbsp milk whisked with a fork and applied to the tops of the scones with a pastry brush before baking. An Australian granny gave me these tips. She was the owner of a tea room in the hills outside of Melbourne.
Great tips, Becky. Thanks. I’ve heard that tip about grating the butter in, but I’ve not tried it myself.
What is the difference between scones and tea biscuits? I’m looking for a good recipe for raisins tea biscuits the kind you buy in a bakery.
Marianne, it really depends where you’re from, because tea biscuits tend to be different things. In England, they’re smaller, less raised than these scones. These are proper English scones that raise quite a bit. They are what is served with afternoon tea or cream tea in England. In America, these would be called biscuits. I would think you could use this recipe for tea biscuits, just make them the size that suits your needs.
Wow! These came out perfect, I grated the butter in, amazing tip! then mixed them with a spoon. I always thought scones were a nightmare, but it was because I was overworking them. The salt and sugar levels are perfect. Thank you so much. Perfect first time around. Also used the egg + milk tip. It gives an amazing uniform golden brown top. This now my go-to recipe.
Thanks Zanele. I’m so glad they turned out so well for you!
Lovely recipe! The man said, best scones he’s ever had. Thank you so much for sharing. x
Best scones
Thanks for the recipe, i am going to try it, I will let you know when its done. Wish me luck
How did they turn out, Abby?
Wow this recipe is very good and it tastes amazing. I love it ❤️
Thanks Rebecca.
Great scones, really light & fluffy.
Delicious.
Thanks for the review, Jenny. Glad you liked them.
Hi can you add sultanas to this recipe please?
Sounds a easy recipe, just one question do you warm the milk to 40c or use cold milk.
I use cold milk.
Is regular flour the same as all purpose flour. I am doing a Christmas tea tomorrow and want to try these scones, thanks.
Hello! Can I use the whey leftover from making clotted cream instead of milk?
Far too much baking powder I had to throw away the scones they tasted horrible. Otherwise they rose & looked good. I’m sure only one or 2 teaspoons of BP would be sufficient.
Love it
No mention of the eggs after the ingredients ?
It is in step 4!
Or the oven temp
I believe the first step tells you what temp you need to have your oven.
This page is confusing!! The recipe is listed at the top of the page, it states 10g baking powder, which I would say is correct, but the method at the top doesn’t include things like oven temp. It was only after making them that I scrolled alllllll the way down and came across the full method, but also another ingredients list which says 20g baking powder!!
They were good scones though (based on 10g baking powder)!
correct Amy 10 gram
The same thing happened to me! The first recipe didn’t include the egg
No oven temperature mentioned; they didn’t rise; And not sure how you measure 5.67 g of sally on a kitchen scales
Hello,
Can I use self raising flour instead?
Perfect
Love the recipe but very salty. Will halve salt next time. Good tips too.
Yes, just tried this recipe. Much to salty! 6 grams! And too much baking powder I think too.
This recipe is a flop! No consistency in the dough after I followed the recipe to the T…exactly as is!! I had to add more flour just to get it a bit firmer and the timing sucks! You can’t possibly be baking scones for 10 to 12 min. It at least needs 15 to 20 min tops.
Hi Laura. Can you confirm whether it is 10 gms or 20 gms of baking powder? There is inconsistency in the ingredient in the earlier and later recipe. I had used the 20gms baking powder and it doesn’t taste good.
Hi, what is the actual measurement for baking powder?? 10 or 20??? Your recipe shows different amounts in different places
It’s 20 grams
Hi Laura, followed your recipe but doubled the ingredients to get bigger scones 15 in total. I baked a batch day before following your recipe got10 in total but they disappeared so quick with butter on, self, family and friends all loved them, I had to do them again so popular, they were so light, fluffy and moist, this last batch have been cooling for an hour and I have broken one open and sure enough they are as good as yesterday light, fluffy and moist. Fan190 ..15min middle shelf perfect for me
These scones never last long at my house either Noel! We are happy they came out so great for you.
Halved the salt and went with 10 (not 20) baking powder. Read the whole recipe if using, as there are a couple of inconsistencies in the writing people have already pointed out above (don’t miss putting the egg in!)
Thank you for sharing this recipe! These scones turned out perfectly fluffy and delicious, just like the ones my grandma used to make.
Glad you liked them Watkins!
I made these scones for my family this morning and they were a huge hit! The recipe was simple to follow and the scones turned out beautifully. We all enjoyed them with a dollop of jam and clotted cream.
Thanks, Zaynah!
This recipe is amazing! The scones came out light and fluffy, with just the right amount of sweetness. I love how versatile they are – I added some raisins to the dough and they tasted fantastic.
Raisins are a great addition, Levi. Glad you liked them.
I’ve tried many scone recipes before, but this one is by far the easiest and the tastiest. I appreciate how detailed the instructions are and how few ingredients are needed. These scones are definitely going to be a regular in my baking rotation.
Glad to hear it, Lucie. Thanks for your feedback.
These scones are simply heavenly!
Thanks Shelton!
It’s so easy to follow, even for a novice baker like myself.
I followed the recipe exactly and they came out perfectly golden and flaky.
I love how quick they are to make – perfect for a lazy weekend morning. Thank you for sharing this recipe!
So glad you liked them Liv.
Can I substitute the all-purpose flour with whole wheat flour to make these scones healthier?
Stehan, swapping whole wheat flour for the plain flour could result in dense, heavy scones. If you really want to try swapping flour I would recommend using 1/4 whole wheat to 3/4 plain flour. See how that comes and out then adjust from there.
What can I add to the scone dough to make it savory instead of sweet?
Hi Crystal, if you are looking for savory options try bacon bits, sautéed onions, or cheese. Watch out for things that could add extra moisture.
Can I freeze the dough and bake the scones later, or will it affect the texture?
Hi Boby, you can absolutely freeze the dough. I would suggest rolling the dough out and cutting it into scones. Then place them on a baking sheet and put them in the freezer until they are frozen solid. Store them in a Ziplock freezer bag or air tight container until you are ready to bake them.
Do you have any suggestions for a dairy-free version of this recipe?
Hi Sarah, you could use shortening or lard or the butter and any alternate milk you like, such as almond or coconut milk.
How important is it to chill the butter before mixing it with the dry ingredients? Can I skip this step if I’m in a rush?
We wouldn’t recommend skipping this step. It is really important to the texture of the scone that the butter be cold. As the cold butter melts in the oven, it creates steam pockets that help the scones rise and creates a lighter texture.
I made these scones with almond flour instead of all-purpose flour to make them gluten-free and they turned out great!
So glad to hear that Edie!
I didn’t have any milk on hand, so I used coconut milk instead and it gave the scones a lovely tropical flavor. I also added some shredded coconut to the dough for some extra texture. These were a hit with my family!
Those sound like great additions Constance.
I used half all-purpose flour and half whole wheat flour for a slightly healthier option. I can’t wait to make these again!
I used some frozen blueberries and raspberries in the dough. They turned out wonderfully juicy and bursting with flavor. I’m definitely going to experiment with other fruit combinations in the future. I didn’t know if it would work, but it did.
That sounds delicious! The only thing you need to watch out for is fruit that will add a lot of juice. It could make the dough really wet.
I added some lemon zest to the dough for a citrusy kick and it was a great addition. The scones were light and fluffy with just the right amount of rise.
Great idea! I bet that was delicious.
They were a bit crumbly but still tasted delicious with some homemade raspberry jam.
I substituted the sugar with allulose and the scones turned out perfectly.
That’s great! I’ve used allulose a few times as well. It’s a great substitute.
I’ll be making these again for sure.
So glad to hear it!
My scones were always heavy until I found this recipe. OMG they were the best scones, so light and fluffy, I had to hold back from eating them all in one go
That’s great Alli! So happy they came out great for you.
So pleased I finally made some fluffy scone with this recipe,thanks
That’s great to hear, thanks!
Thank you for the recipe. Scones came out just perfect! Followed the recipe and tadaaaa we got to enjoy soft and delicious snack.
That’s great Irini! We are always happy to hear that they came out great. Thanks for giving them a try.
this recipe is easy and simple and makes the best scones .
Thanks for your feedback, Zeta!
My partner said late one night I just fancy a scone which surprised me because he had never had a cream tea on our many trips to Cornwall, so the next day I came across your recipe and WOW they were amazing, even better than from the shop.
So glad you liked them Joanne!
I’m going to try your technique of freezing the scones for a few minutes before baking. Should I add extra oven time for frozen scones? Or change the temp?
Hi Bob, no need to change the time or temperature as long as you don’t leave them in the freezer longer than 30 minutes. I hope they come out great for you!
As an English scone maker for well over four decades, might I suggest you use buttermilk in place of your egg and milk? It is fabulous. I use the buttermilk created by making butter from double cream, works out cheaper than buying butter, and there’s the benefit of the free buttermilk!
That’s a great suggestion. It’s always good to learn different versions of a recipe. Thanks for stopping by!
I’ve made these scones dozens of times because they are so delicious and so easy to put together. Freshly made scones straight from the oven in less than an hour, yes please! Wonder if I could add frozen blueberries to this mixture for blueberry scones?
We are so happy to hear that you love the scones Jazz! I’m right there with you about fresh scones out of the oven. Is there anything better? I think using frozen blueberries would work really well. I add frozen huckleberries when I have them. Adding them frozen will help them hold their shape and not get mashed up as you mix them in. Let us know how they come out!
AWESOME! Perfect recipe and description for beginners too 🙂
Did not raise well at all seemed tasteless
I’m sorry they didn’t come out well for you Laura. I am wondering if your baking powder is old. That can happen sometimes and will affect the rise.