
These Valentine’s Chocolate Bombs are such a fun treat, especially when all dressed up for Valentine’s Day. They make a fantastic gift to give to your valentine, your kid’s class, or your group of close friends.
» You might also like these Pink Champagne Cupcakes or Heart Hand Pies.

If you’ve never seen these viral chocolate bombs, originally made by Eric Torres Garcia, later becoming a Tik Tok sensation, they are tempered hollow chocolate spheres filled with cocoa mix and mini marshmallows that will melt to create a delicious warm drink when dropped into a mug of warm milk.
They are super festive and not all that difficult to make, despite what you might think, seeing how adorable they are. If I can make these, anyone can. Seriously. I am not a perfectionist when it comes to baking and often my treats turn out looking a bit hokey, but I think mine are quite cute.

With tempering the chocolate, they only take about 30 minutes to make, start to finish. And all you need is a silicone sphere mold, a spoon, a spatula, a heat-proof bowl, and a plastic baggie. I’ll explain in a bit.
I like to make these bombs in a pack of 3 and give them out to friends with a little Valentine’s day card attached. They’re also great for handing out at school, if your child is able to do so. They melt perfectly into a mug of warm milk.
» For more holiday recipes – Valentine’s Day Cupcakes & Desserts.
Ingredients You Need
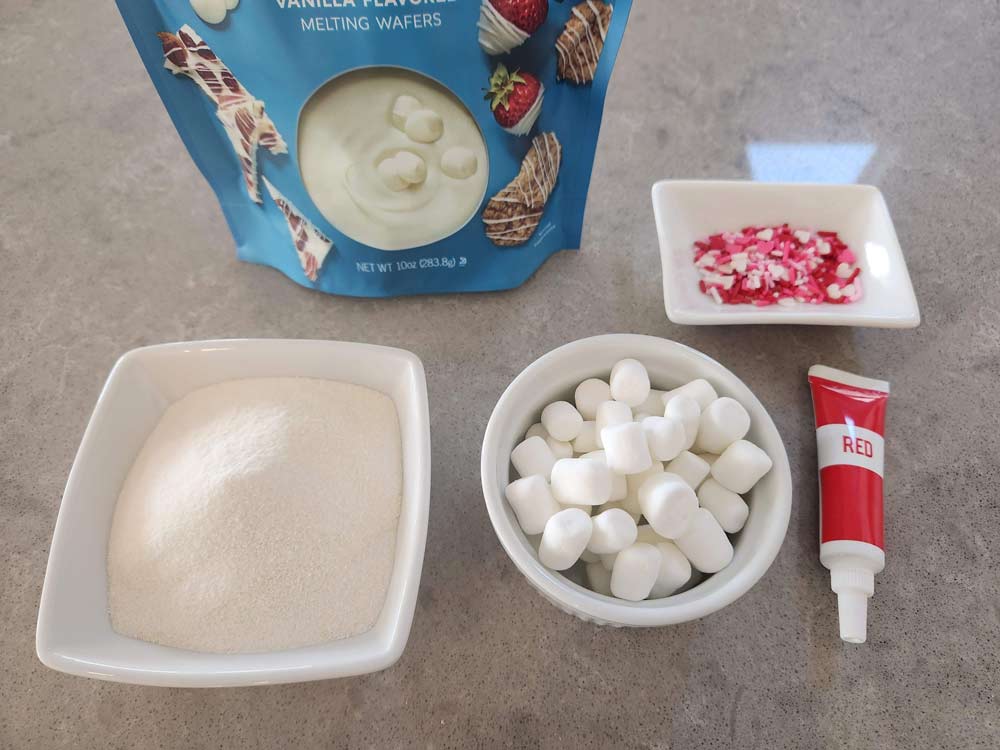
- High-quality white chocolate – I always use Ghirardelli white chocolate wafers. They taste really good and melt well. You NEED a high-quality chocolate.
- Hot cocoa mix – It doesn’t matter what brand you use, but you’ll obviously want one that you enjoy drinking. I use Ghirardelli double chocolate premium hot cocoa mix.
- Mini marshmallows – I use Jet Puffed mini marshmallows. You can sometimes find them in pink, but go with what you can find.
- Red or pink food coloring – Liquid or gel works fine.
- Sprinkles – If can be difficult to find good sprinkles, so get whatever you can find. I use these sprinkles from Amazon.
Equipment You Need
- Silicon sphere mold – to make the chocolate spheres
- Pastry paint brush – for brushing the chocolate into the mold
- Piping bag – for decorating the bombs
- White chocolate wafers – I use Ghirardelli
- Valentine’s Day sprinkles
- Cupcake liners
- Waterproof candy thermometer
How to Make Valentine’s Day Chocolate Bombs
Step 1: Temper the chocolate
Set up a double boiler with a heat-safe glass bowl that fits over a small pot on the stove. The glass bowl shouldn’t touch the water.
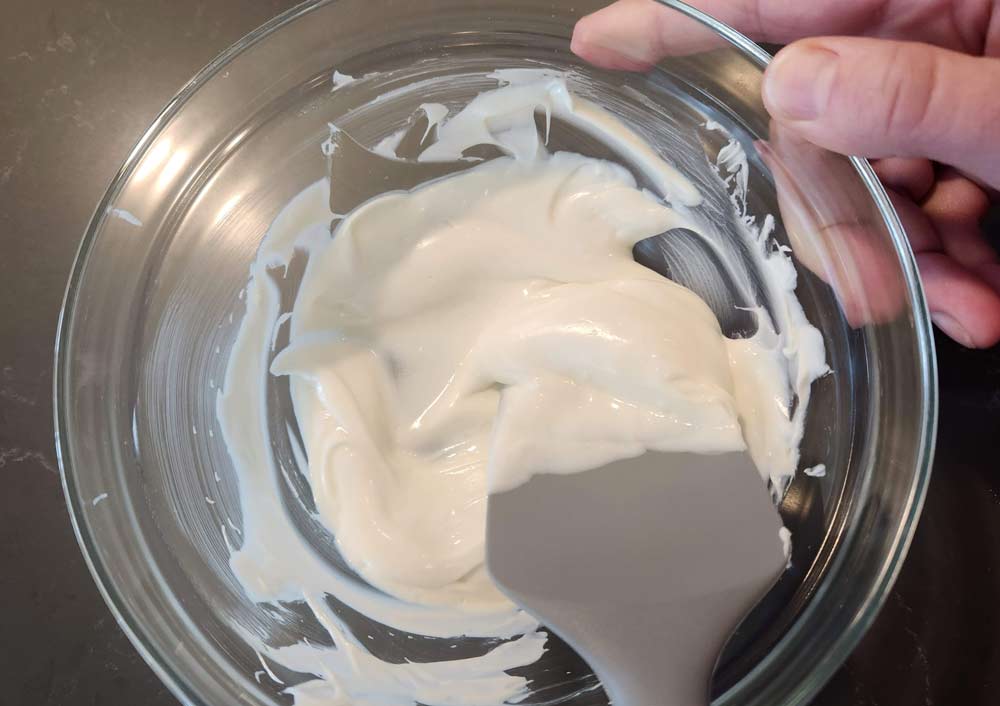
Heat just about an inch of water in the pot over medium heat. As it heats up, place half the chocolate wafers into the heat-safe glass bowl and place it on top of the pot. I get it to just about boiling and then turn it down to simmering. You don’t want to allow the chocolate to get too hot or it will scorch.
Stir the chocolate with a silicon spatula as the chocolate melts. If you have a digital thermometer, place it in the chocolate and set it against the pot while you stir. As soon as the chocolate is about half melted, remove the glass bowl from over the heat. Set it on the counter and continue stirring until all of the chocolate melts.
The chocolate needs to get to about 100 degrees F, but not go over. Once the chocolate is completely melted, stir occasionally until the chocolate cools to 82 degrees F. Now place the bowl back on the double boiler and bring it back up to 88°F to 91°F.
Try to keep the chocolate between this range while working, if possible. If it goes a little below, that’s fine, but you don’t want it to get too cool or it’ll seize up.
Step 2: Create the chocolate spheres
Once the chocolate is back up to temperature, use the back of a spoon or a pastry brush to cover the inside of each sphere.

Spread it on thick enough so it won’t break when you take it out of the mold, look around for any holes to patch, and make sure the chocolate goes a little bit up over the top. Doing this will make sure the sphere is whole when you remove it from the mold.
A quick note about colors. If you want to make 3 of the bombs white and 3 pink, just paint one mold with white chocolate first, go through the rest of the steps below to firm up those spheres. Then add a few drops of red food coloring to the chocolate to make it pink and do the last 6 halves in pink.
Once you’re done painting, place the mold in the refrigerator for 5 minutes to firm up. When you take it out, look for any holes that remain, add a second layer of chocolate, if you want, to make it firmer. Let if chill for another 5 minutes in the refrigerator.
Remember, you don’t need to make the chocolate layer super thin. The more chocolate you put on, the more that will melt into your drink (yay!) and the studier the bombs will be.
Take the mold out of the refrigerator and carefully remove the chocolate shells from the mold. Place them on a piece of parchment paper or a baking tray.
Step 3: Fill & seal the bombs
Heat a small pan over low heat on the stove for about 15-30 seconds, then turn it off. Take one of the empty halves and quickly melt the rim of it on the pan, just for a second. This will be the bottom of the sphere.

Now you can fill each half with 1 tablespoon of hot cocoa and some mini marshmallows. Don’t fill it too much or you’ll have trouble attaching the top half.

Now melt the rim of the second half and quickly place it on top of the filled half. If you do it quickly enough, while the chocolate is still melted, it will attach right away, with no fuss.
Working quickly, do this for of the all spheres.

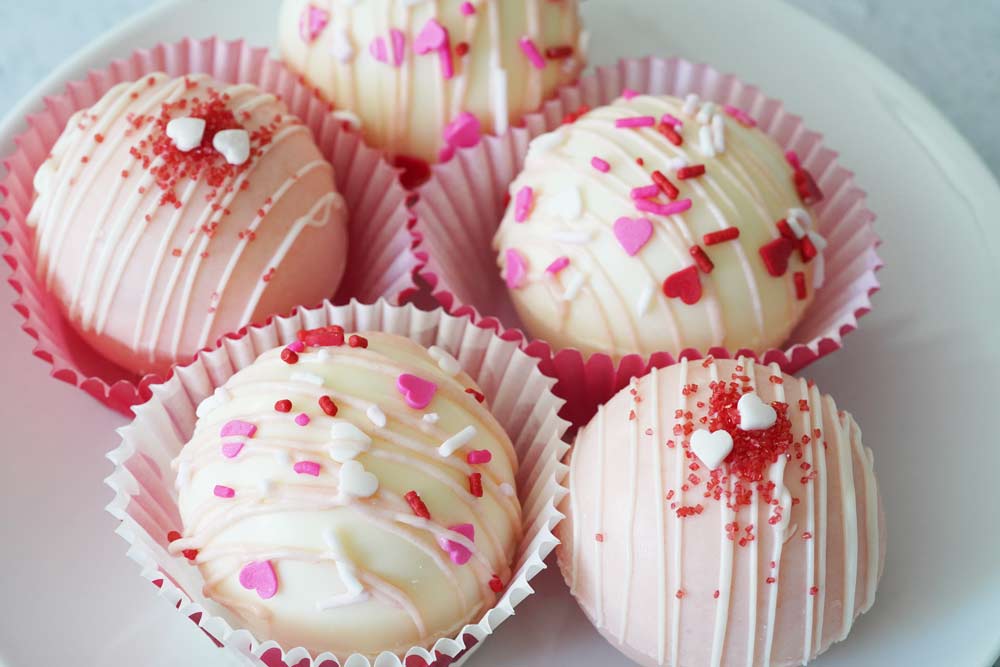
Step 4: Decorate the bombs
To complete the look, you can drizzle melted chocolate over the tops of your spheres and decorate them with sprinkles, if you like. I like to vary the colors of the drizzle.
Since I did my pink spheres last, I still had some pink chocolate left, which I added to a small sandwich bag. I cut off a very small piece of one of the corners to make a piping bag. Then you can squeeze the bag and drizzle the pink chocolate over the white bombs.
If you want to also decorate with white chocolate, put 1/4 cup of white chocolate wafers in a microwave safe bowl and microwave it at 15 second intervals until it’s 1/2 melted. Remove it from the microwave and stir until it’s all melted.
When it’s cool slightly, place the white chocolate into another sandwich bag to drizzle over the bombs.

If you have sprinkles to put on, add them while the chocolate drizzle is still wet so that it adheres well.

Serving Instructions
To serve the hot chocolate, you just need to steam or microwave 8 ounces of milk until it’s warm/hot. I say this because the milk needs to be hot enough to melt the chocolate, but not so hot that it’s boiling. Be very careful not to overheat the milk!

Pour the milk into a mug and drop the bomb into the mug. The chocolate will begin to melt and the marshmallows will float to the top. Stir it really well until all of the cocoa is incorporated and the chocolate is melted in. Enjoy.

How To Temper Chocolate
The thing that keeps people from making these beautiful sphere chocolate bombs is often tempering the chocolate. However, tempering is actually pretty easy, so I encourage you to give it a try. It doesn’t have to be perfect. No one expects that.
To temper chocolate, you need to do these steps:
- Create a double boiler by placing a glass bowl over a pan, filled with an inch of water on the stove top. Heat the pan so the water is at a low boil, while the glass bowl does not touch the water.
- Add the chocolate to the bowl and stir until it starts to melt. When half melted, remove it from the boiler and stir until all the chocolate melts. Take its temperature with a digital read thermometer. It should be about 100°F.
- Stir until the chocolate reaches 82°F. Return to the water and heat back up to 86-90°F. Keep the chocolate at this range while using it.
What If the Chocolate Gets Too Hot?
You don’t want to let the chocolate exceed 120°F for dark chocolate or 105°F for milk or white chocolate. Going above this has a high chance of ruining the chocolate. It might scorch and burn. If it hasn’t burned, but you’re not willing to see if it will work and maybe have to try again, you should just throw out the chocolate and start over.
If you’re willing to try to work with it, bring the temperature of the chocolate down as quickly as possible by adding more chocolate and stirring rapidly. It’s possible it will survive the overheating.

Frequently Asked Questions
Can I use a different type of chocolate?
You can use any type of chocolate you want to make chocolate bombs. The only chocolate I’ve had not work well is dark chocolate, around 65% and higher. This is because dark doesn’t contain as much milk fat and it cracks too easily. You can use semi-sweet, milk, white, etc.
Can I use another type of mold?
You can use any silicon mold to make these bombs. You can use a heart-shaped mold for a more romantic one. Here’s another cool heart-shaped mold. Here’s a flower-shaped mold to try.
Do I need a food paint brush to make there?
I found that the back of a spoon works just as well as the paint brush. If you have one, it’s great for filling in holes in the spheres, but it’s not necessary to have it.
Like it, Love it, Want Some More of It? Subscribe to our YouTube channel to watch us cook and follow us on Pinterest, Instagram and Facebook. We really love it when you save our recipes to Pinterest 😊

Valentines Chocolate Bombs
Ingredients
- 10 ounces Ghirardelli white chocolate chopped
- 6 tablespoons hot cocoa mix about 2 packets
- 1/2 cup mini marshmallows 1 ounce
- red or pink food coloring
- festive sprinkles
To Serve
- 8 ounces whole milk
- Whipped cream optional
- Pink sprinkles optional
Instructions
- Set up a double boiler with a heat-safe glass bowl that fits over a small pot on the stove. The glass bowl shouldn’t touch the water.
- Heat about an inch of water in the pot over medium heat. Place half the chocolate wafers into a heat-safe glass bowl and place it on top of the pot.
- Stir the chocolate with a silicone spatula as the chocolate melts. Do not allow the chocolate to get too hot or it will scorch.
- Remove from heat as soon as chocolate is half melted.
- Continue stirring until all of the chocolate melts. Then add the remaining chocolate and stir until melted.
- Once the chocolate has cooled to 82 degrees F, place the bowl back on the double boiler until smooth enough to paint into the mold. Keep chocolate between 82°F and 90°F while working, if possible.
- Use a food paint brush to cover the inside of each sphere. Place the mold in the refrigerator for 5 minutes.
- Remove the chocolate shells from the mold.
- Place half of the molds, cup facing up, on a flat surface. Fill with 1 tablespoon hot cocoa and 1 tablespoon mini marshmallows.
- Heat a small pan over low heat on the stove then turn it off. Quickly melt the rim of the unfilled mold on the pan then stick it to the filled mold to adhere them together. Working quickly, do this for all spheres.
- To complete, drizzle melted chocolate over the tops of your spheres and decorate with sprinkles. Change the color of the drizzle by adding a drop of food coloring.
- To serve: Steam or microwave 8 ounces of milk. Place one hot chocolate bomb in a mug and pour the steamed milk over the top to melt the chocolate. Stir and enjoy.
Equipment Needed
- Silicon mold https://amzn.to/3IpcEW9
Nutrition

Laura is a home cook, with 25 years experience behind the stove, who spends an extraordinary amount of time in the kitchen cooking. She loves making new recipes and finding wonderful new things to eat, both at home or abroad. She spends a lot of time researching, crafting, and perfecting her recipes.
My kids loved them.
They’re really pretty. I didn’t have white chocolate filling so I used regular chocolate powder. I don’t think anyone cared once it made it into the glass
I doubt anyone would notice. It’s a good substitution if you need it.
I made these from my daughter’s sleepover. I added some pink sprinkles to the inside. So much fun!
I found these fun lucky charm marshmallows. They add a fun surprise to your mug.
That’s cute. Good way to customize it.