
This recipe is based on the New York-Style Thin-Crust Pizza Recipe in the Science of Good Cooking book.
I tried so many times to make the perfect homemade pizza dough that turns out as good as restaurant pizza before I came across this recipe that changed my pizza making dramatically.
» You might also like this Five-Cheese Penne al Forno or Hot Honey Pizza.

This homemade pizza dough recipe is a winner. It turns out chewy on the inside, while crispy on the outside, even if you don’t have a wood-fired oven to cook it in.
How to Ensure a Thin Crust
I’ve always wondered what made my crust rise up so much while it cooked, even though I made the dough as thin as possible before adding the toppings. In the Science of Good Cooking book, they explain that it’s the process of fermentation that forms the puffy crust.
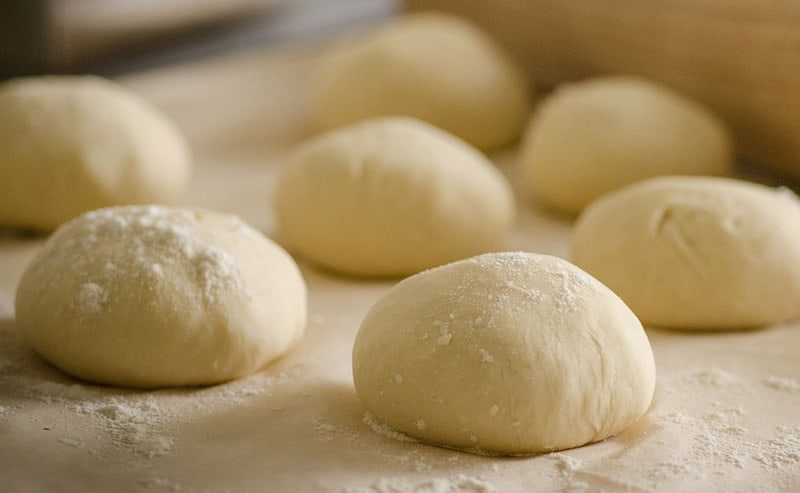
If you allow your pizza dough to proof (or rise) on the counter top, bubbles will form from the fermentation, which will turn into fluff-producing holes in the center of your dough. To prevent this, this recipe doesn’t call for any counter top rising. Instead, the dough is left in the refrigerator to rise.
Top Tips for Perfect Pizza Dough
1. Use a High-Protein Flour
One of the keys to a thin, crisp New-York style crust is to use flour with a high-protein ratio. This is because the protein encourages gluten development, which is what makes the dough chewy.
Bread flour is the best option for high-protein.
2. Chill the Dough
Rising the dough in the refrigerator for a longer period of time creates a dough that will produce less bubbles, so it will be thinner and less cake-like when cooked. It also produces more sugar, alcohol, and acids that help tremendously with the flavor.
3. Add Sugar and Oil
Adding these elements to the dough helps form a browned and crunchy crust, due to the caramelization of the sugar and the Maillard reaction.
4. Stretch by Hand
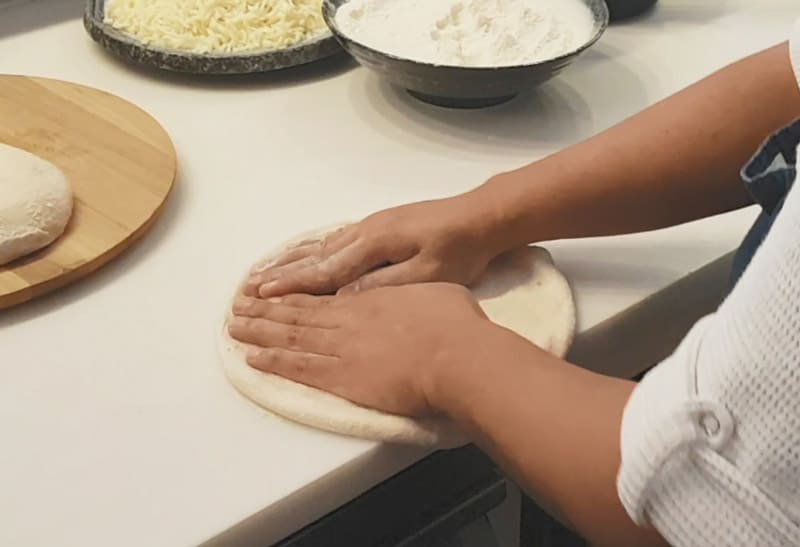
Instead of using a rolling pin, it’s better to stretch the dough by hand, just as they do in every great pizza house. It gives the crust a lighter texture. A rolling pin needlessly toughens up the dough.
To stretch the dough, add some flour to the countertop and the dough, so it doesn’t stick. Then start to flatten the dough into a circle with the pads of your fingers. Once it’s flattened out, place your hands on the dough (like pictured above) and use a fanning motion to slowly stretch the dough.
You can also hang the dough off the counter a bit to allow gravity to help with the stretching. You want to get the dough as even and thin as possible, so it cooks evenly and completely (see below).

Topping Your Pizza
For this thin crust pizza, you’ll want to keep the toppings light. Spread on the pizza sauce, dust with finely shredded mozzarella and then add your desired toppings.
We love plain pepperoni around our house, but this philly cheesesteak pizza has become one of our favorites.
Here are two more interesting options to try:
How to Cook a Pizza
The very best option is in a wood-fired oven. If you have one of these, I’m jealous.
The best option for most people is in the oven. However, I do love this Betty Crocker Countertop Pizza Maker. This 12″ pizza pan & indoor grill has an easy to clean because of the nonstick surface.

This awesome little machine can cook up to a 12-inch pizza (plus lots of other items – almost like an air fryer). The best feature is the top and bottom heating elements that enable the pizza crust to cook while the toppings are cooking.
Cook at the Top of the Oven
If you are using a regular kitchen oven to cook your pizza, there are a few tricks to make a better crust.
Many doughy tests were done to figure out what location in the oven is the best to cook a pizza. Baking at 500 degrees at the top of the oven gives the dough the best chance of cooking evenly. It doesn’t take long, so be sure to keep an eye on the toppings. As soon as they start to bubble up, it’s ready.

No matter what you decide to top this pizza dough with, it’ll be delicious with this homemade pizza crust.
If you want to make it up in advance, you can store this dough in the freezer for later use. Just make sure to package it up in an air-tight wrapping. When you’re ready to use it, let it thaw completely in the refrigerator before use.
Reheating Pizza
We’ve finally found the ultimate way to reheat pizza and that’s in the air fryer! Stop trying to revive day-old pizza in the microwave and learn how to reheat pizza in the air fryer.
YOU MIGHT ALSO LIKE


Like it, Love it, Want Some More of It? Subscribe to our YouTube channel to watch us cook and follow us on Pinterest, Instagram and Facebook. We really love it when you save our recipes to Pinterest 😊

Homemade Pizza Dough
Ingredients
- 3 cups bread flour
- 2 teaspoons sugar
- 1/2 teaspoon instant or rapid-rise yeast
- 1 1/2 cup ice water
- 1 tablespoon vegetable oil
- 1 1/2 teaspoons salt
Instructions
- Combine the flour, sugar and yeast in the basin of a food processor with the dough blade attached. Pulse a few times to mix thoroughly.
- Turn the food processor on low. Slowly pour in the water. Mix until fully combined, about 15 seconds. Turn off the machine and let dough rest for 10 minutes.
- Add the oil and salt to the dough and turn the machine on low until fully mixed into a sticky ball.
- Transfer the dough to a lightly floured surface and knead by hand for about 1 minute, until the dough is smooth. Shape the dough into a ball and place in a lightly oiled bowl, covered with plastic wrap.
- Refrigerate the dough overnight or for up to 3 days.
- When ready to prepare your pizza, position an oven rack near the top of the oven. Preheat oven to 500 degrees F. Remove the dough from the refrigerator and let rest for 10 minutes. Place the dough on a floured surface. Using your fingers, spread the dough out into an 8-inch round, then stretch the dough little by little into a 12-inch pizza dough.
- Place dough onto a pizza stone. Top with your favorite pizza toppings. Bake in the oven on the top rack for 8-10 minutes, or when the toppings begin to brown, the cheese is bubbling and the crust begins browning.
- Transfer the pizza to a wire rack and cool slightly before slicing and serving.
Equipment Needed
Notes
- This recipe makes 2 10″ pizza crusts.
- If you don’t have time to rise the dough overnight in the refrigerator, let it rise on the counter top for 30 minutes instead.
Nutrition
Pin it for later!

Laura is a home cook, with 25 years experience behind the stove, who spends an extraordinary amount of time in the kitchen cooking. She loves making new recipes and finding wonderful new things to eat, both at home or abroad. She spends a lot of time researching, crafting, and perfecting her recipes.
I don’t have a large food processor. Can I use my stand mixer on high?